Jobs
Jobs
This chapter covers how to run and create Jobs.
Why create a Job?
- One might find certain command executions are done repeatedly, and perhaps, represent what has become a routine procedure.
- Another user in your group needs a simple self-service interface to run a procedure across a set of nodes.
- Routine processes need to be encapsulated and become the basis for other routine procedures.
Overview
Jobs provide a means to encapsulate a process. A Job is a configuration representing input options, the steps in the process, a filter expression that matches the nodes where those steps will execute, and execution control parameters that specify if steps are run in parallel and what to do if an error occurs in one of the steps.
Job access is governed by an access control policy you define declaring how users are given privileges to read, create, edit, run and kill Jobs.
Rundeck lets you organize and execute Jobs and observe the progress as the Job is running. You can view a list of the currently running Jobs or drill down to see the output of individual executing steps. Job executions can also be aborted if they need to be stopped.
Each Job execution is stored and contains information about the nodes where steps executed, success and duration of each step. The job execution output can be downloaded, forwarded to an external log store or sent as part of a notification via email, IRC, ticketing system, or other destinations.
The next sections describe how to navigate and run existing Jobs. In later sections, the topic of Job creation will be covered where you will learn about steps and job options
If you want to skip ahead, you can go straight to Creating Jobs.
Job groups
As many jobs will accumulate over time, it is useful to organize Jobs into groups. A group is a logical set of jobs, and one job group can exist inside another. Rundeck displays job lists as a set of folders corresponding to the group structure your jobs define.
To create a new job group, create a new job and type in the name of the group the job should be stored in. After creating the job, the group will be created and can be selected in UI for future job creation.
Beyond organizing jobs, groups assist in defining access control policy, covered in the Administrator guide - Access Control Policy.
Job UUIDs
When created, each new job will be assigned a unique universal identifier (UUID). If you are writing the Job definition using one of the supported formats you can assign the UUID yourself.
You can use the UUID to make sure that when you rename or change the group for your job in your job definition, it will modify the correct job in the server.
The UUID is also useful when porting Job definitions between Rundeck instances.
Note
We do not require that this field is compliant with the UUID format but be careful creating custom UUIDs as this can lead to inconsistencies in job loading.
Listing and filtering Jobs
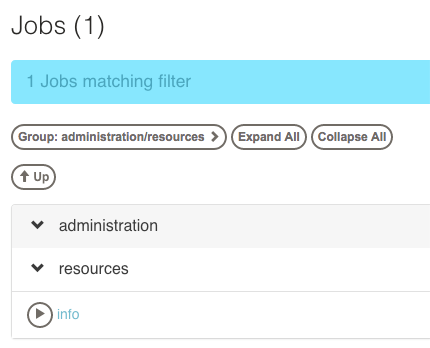
All Job activity begins on the main "Jobs" page inside Rundeck. After logging in, press the "Jobs" tab in the top navigation bar and any Jobs you are authorized to see will be displayed.
If the Jobs were defined inside groups, you will see the listing grouped into a folder like structure. These folders represent the Job groups described earlier. You can navigate these folders by pressing the folder icon to reveal its contents.
Once you have navigated to a Job, you will see its name, possibly its description and a summary total of how many times it has been executed.
Clicking on the job name will expand the window to show the Job detail. You will see a button bar containing icons representing the actions you are able to perform. Other Job detail will include what command(s) it will run, filter expressions and other dispatcher options.
Filtering Jobs
The Job page lets you search for Jobs using the Filter option.
Click the "Filter" link to show the filter options:
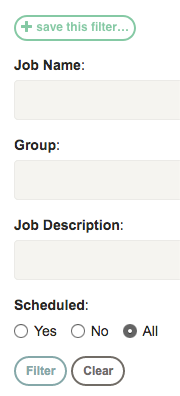
This will show the Filter fields. Enter a value in any of the filter fields:
- Job Name: the name of the job
- Group: the name of the job group
- Description: Job description text
- Scheduled: Include jobs that have been scheduled.
You can type a substring or a regular expression in any of these fields.
After pressing the "Filter" button, the Job list will be filtered to include only the matching jobs.
To refine the filter, click on the blue-outlined Filter description, and change the filter fields.
To reset the filter and go back to the full job page, click the "Clear" button in the Filter fields.
Running a Job
Navigate to the desired Job from the filtered listing and then press the "Run" icon to immediately run the Job. If you do not see the Run icon, it means your login does not have "run" privileges for that job.
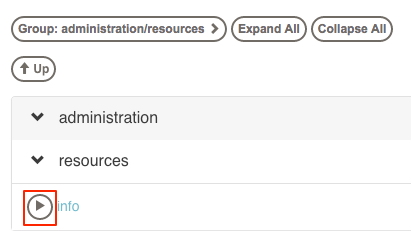
If you navigated to the separate job page, press the "Run" button there.
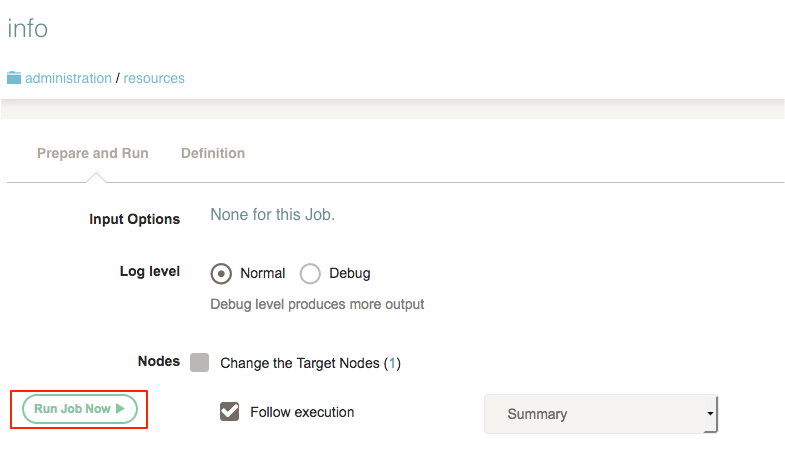
The Run job dialog allows you to input Job options if any, Log level, Nodes selection and how you want to follow the execution.
Choose execution options
Jobs can be defined to prompt the user for options. This page contains a form presenting any of these Job options.
Some options will have default values while others may present you with a menu of choices. Some options are optional while others are required. Lastly, there might be a pattern governing what values are acceptable.
If there are any such Job options, you can change them here before proceeding with the execution.
When you are ready, press "Run Job Now". The job will enter the execution queue and you can track its execution in the Activity section of the page, or by going to the Activity page.
Following Running Jobs
Once you have started running a Job, you can follow the Job's output in the Execution page.
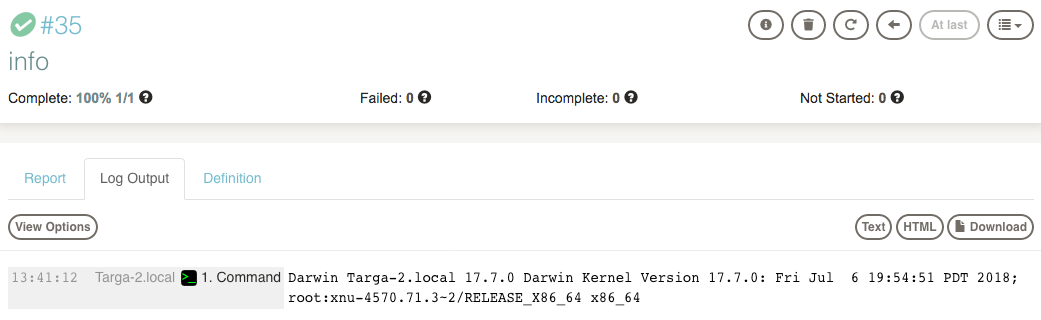
On the Jobs list page, look in the "Running" tab in the Activity section of the page and click the execution ID's progress bar.
If you pressed the "run" button from the Job's detail page, or you selected to "Follow execution" when you ran the job, your browser will already have been directed to the Execution Follow page.
Viewing Job detail
A Job's definition can be shown by clicking on the Definition tab in the Job Show page or in the Execution page.
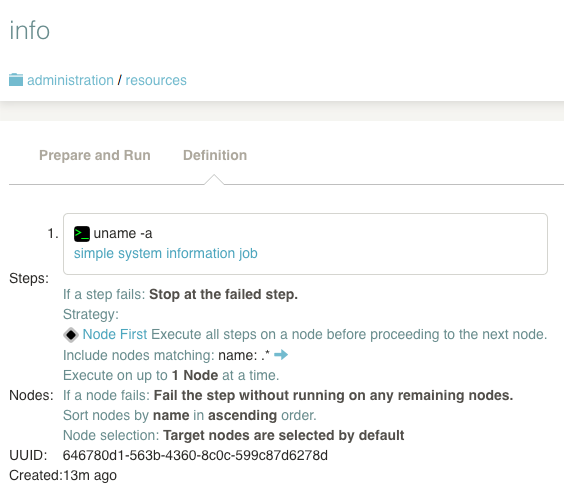
The information in the Job detail view includes:
- Steps the job will execute
- Options presented to the user at the time of job run
- Node filter expression with a button to show the matched nodes
- Job UUID
- Creation date
- Statistics about the job executions
Pressing the "Show Matches" link will display the list of Nodes where the Job will run.
Job history
In the Job page, you can see the outcome of previous executions of Jobs by looking at the Activity section.
You can click on any past execution in the list to see the full execution for that job run.
You can also navigate to the Activity page from the top navigation bar and use the search filter to find executions by typing in the job name.
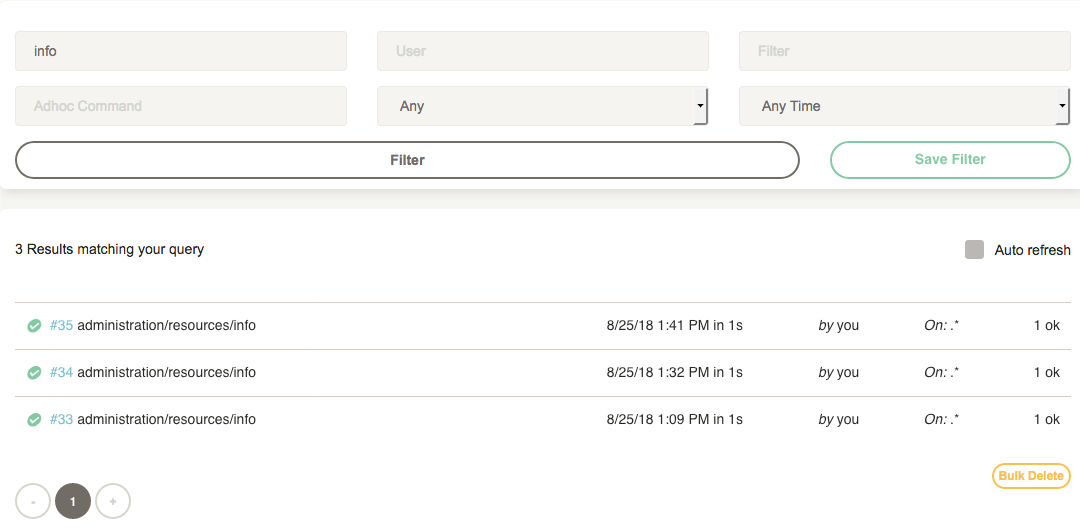
The Jobs page also contains all executions for the job group shown.
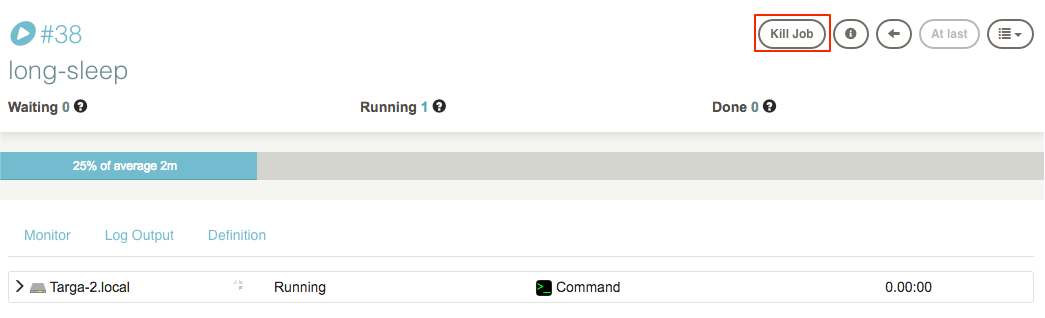
Killing Jobs
Jobs that are currently running can be Killed immediately.
WARNING: This feature should be used with caution, as it forcibly kills the Java Thread that the Job is running on.
From the Activity view Now Running section, or in the Job execution follow page, click on the "Kill Job" button for the running Job.
When prompted "Really kill this job?" Click the "Yes" button.
The Job will terminate with a "Killed" completion status.